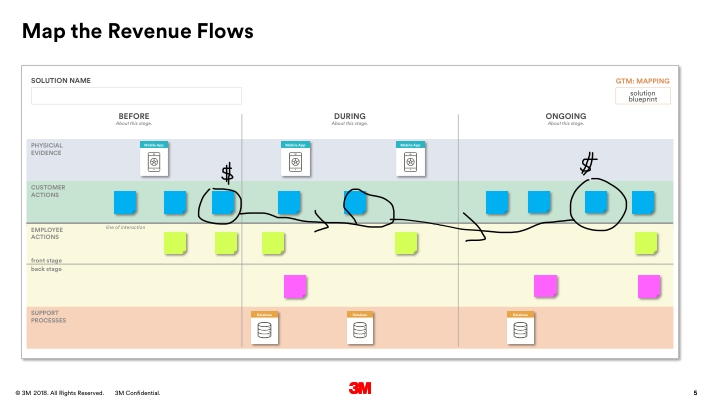
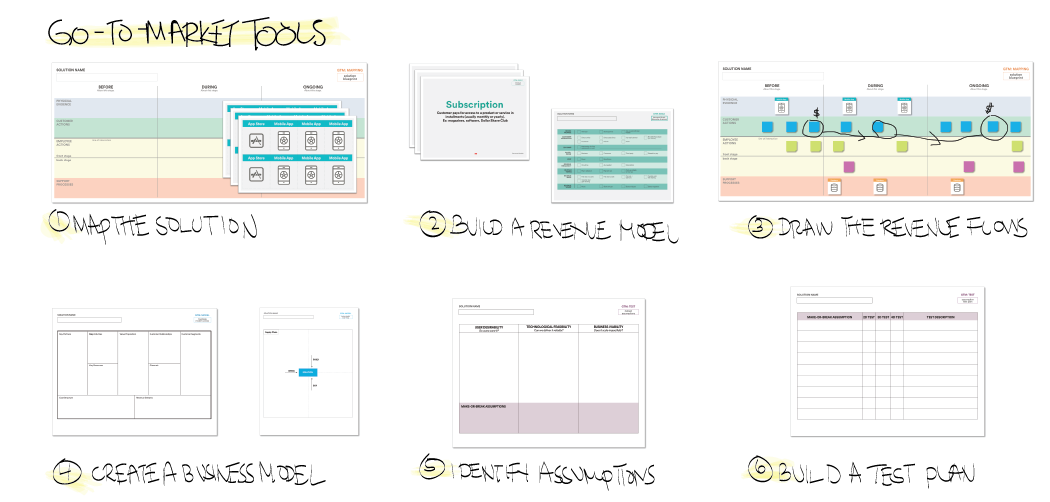
Start by understanding the people, stuff, systems and processes that must be in place in order to deliver your solution.
How to Do It
- Print and hand or draw the solution blueprint template on the wall. Make you it’s bigger enough to hang post-its and the evidence/support process cards.
- Begin by placing the steps in the ideal customer journey(s) in the “customer actions” (green) row. It’s a good idea to write these on post-its so they can be moved around as needed. You may have more than one customer/customer journey.
- Next, fill in the employee journey(s) in the “employee actions” (yellow) rows. The top row is for actions where an employee is interacting directly with a customer. The bottom row is for any action that happens in-directly or behind the scenes.
- Now, determine and place the “support processes” needed in order for employees to do their job and/or deliver the ideal customer journey in the orange row. Use the provided cards— orange cards— as starters and fill in blank cards as needed.
- Finally, determine and place the “physical evidence” of the solution (the physical and digitals manifestations of solution” into the blue row of the blueprint. Use the provided cards— blue cards— as starters and fill in blank cards as needed.
- Stand back and review your blue print. Is there anything missing? What needs to be created/acquired first in order to stand up the solution?
Tip: Use post-it notes and re-stickable tape to allow for maximum flexibility and iteration. The blueprint will be iterated upon many times as we build out the rest of the Go-to-Market strategy.
Download the solution blueprint template
Download the physical evidence and support process cards